Setting Up HaloPSA Integration
This guide walks you through connecting your HaloPSA instance to Triggr.
Overview
The HaloPSA integration enables Triggr to automate tasks within your PSA, including:
- Managing tickets and service requests
- Asset management and inventory tracking
- Client onboarding automation
- Agent and team management
Prerequisites
Before you begin, ensure you have:
- Admin access to your HaloPSA instance
- Access to Configuration > Integrations in HaloPSA
Step 1: Create an API Agent in HaloPSA
First, create a dedicated agent for the Triggr API integration.
- In HaloPSA, navigate to Configuration > Teams & Agents > Agents
- Click to create a new agent
- Set the Name to
Triggr API - Assign Administrator permissions for full functionality
- Save the agent

Step 2: Create an API Application
Next, create an API application that Triggr will use to authenticate.
- Navigate to Configuration > Advanced > Integrations > HaloPSA API
- Click View Applications
- Click to create a new application
- Set the Name to
Triggr - Set Authentication Method to Client ID and Secret (Services)
- Set the Agent to
Triggr API(the agent you created in Step 1) - Save the application

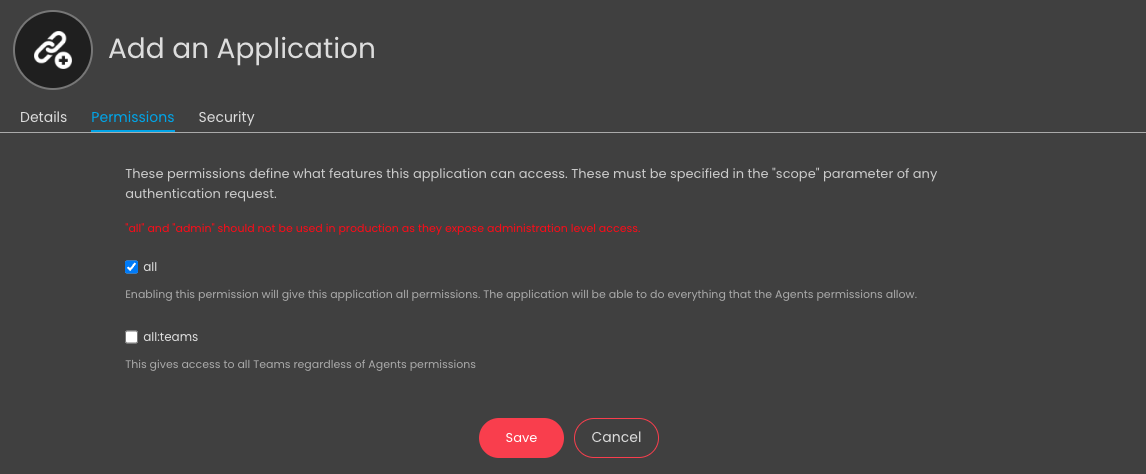
Step 3: Configure Permissions
Set up the required permissions for the API application.
- Open the application you just created
- Go to the Permissions tab
- Enable the All checkbox to grant full API access
- Save the permissions
Step 4: Add Agent to Teams
Ensure the API agent has access to all teams.
- Go to the Departments & Teams tab in the application settings
- Add the
Triggr APIagent to all teams that require automation - Ensure Allow use of all Customers is set to Yes
- Save the settings
Step 5: Copy API Credentials
Now copy the credentials you'll need for Triggr.
- In the application details, locate and copy:
- Client ID
- Client Secret
- Note your HaloPSA URL (e.g.,
yourcompany.halopsa.com)
Important: Store your Client Secret securely - you may not be able to view it again after leaving this page.
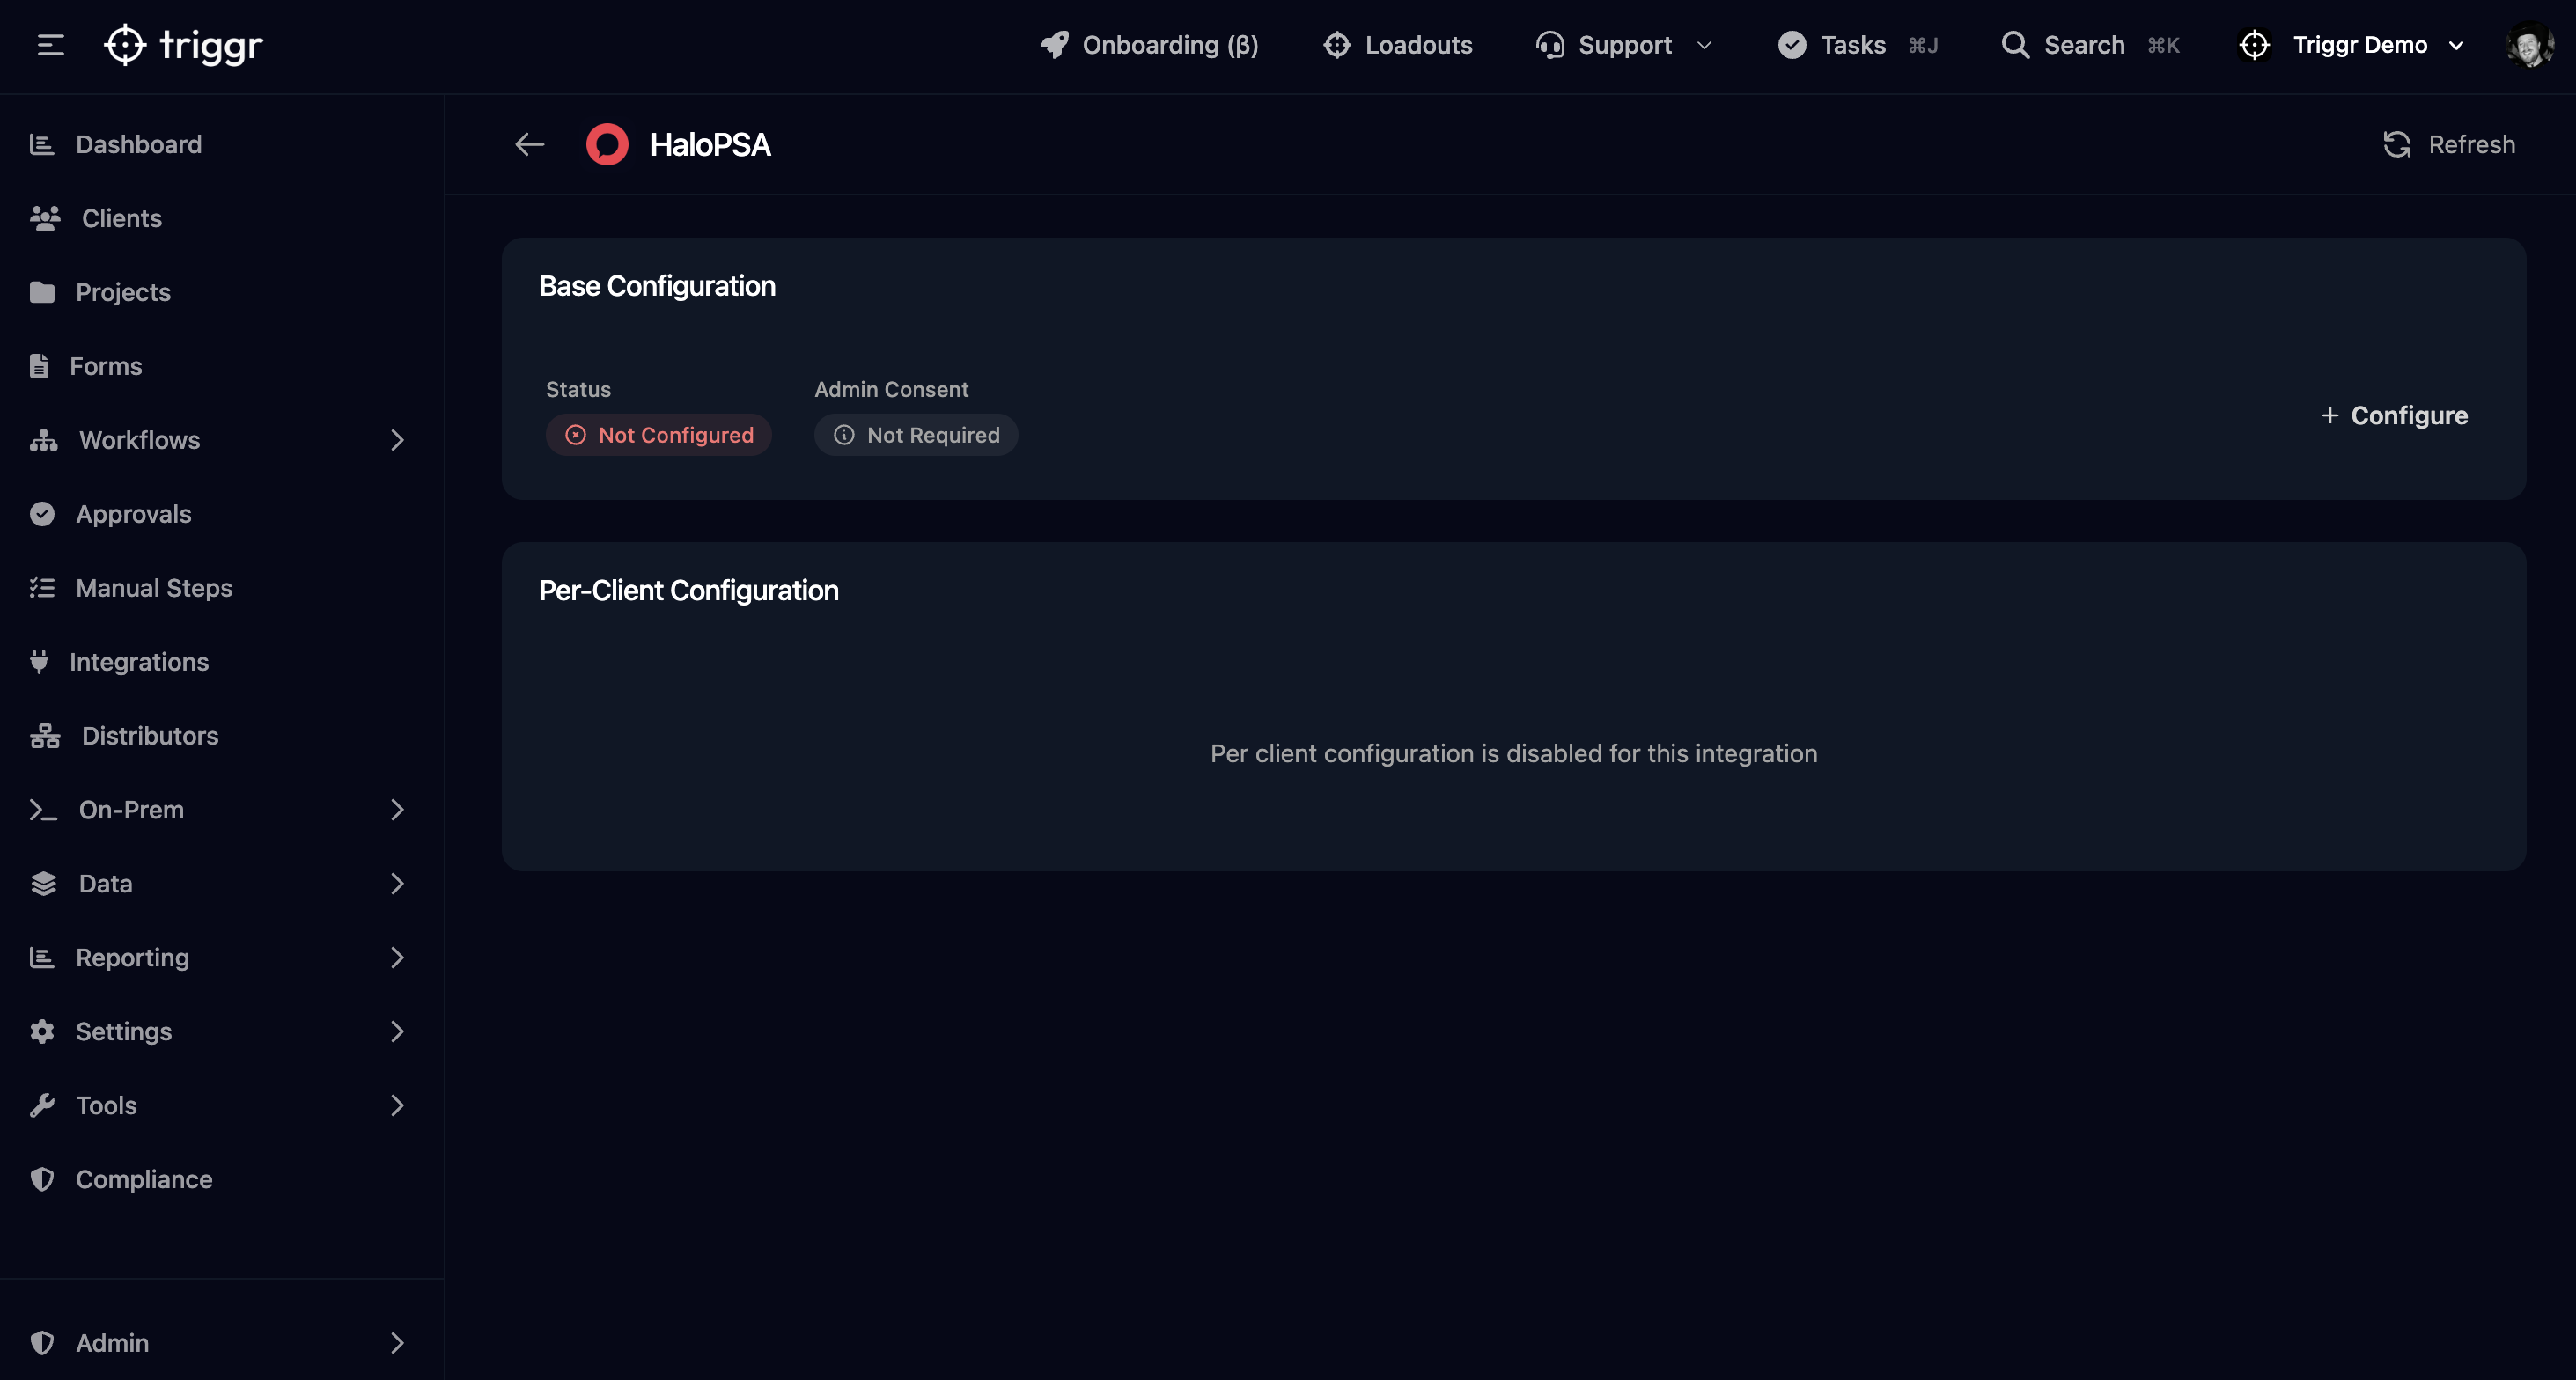
Step 6: Configure in Triggr
With your API credentials ready, configure the integration in Triggr.
- In Triggr, navigate to Integrations
- Find and select HaloPSA
- Click + Configure to the right of the Base Configuration card
- Enter the following details:
- Client ID: The Client ID from Step 5
- Client Secret: The Client Secret from Step 5
- Resource Server Hostname: Your HaloPSA URL (e.g.,
yourcompany.halopsa.com) - Auth Server Hostname: Your HaloPSA auth URL (e.g.,
yourcompany.halopsa.com/auth) - Is On-Premise: Select if using an on-premise installation
- Tenant ID: Your tenant ID (for cloud instances)
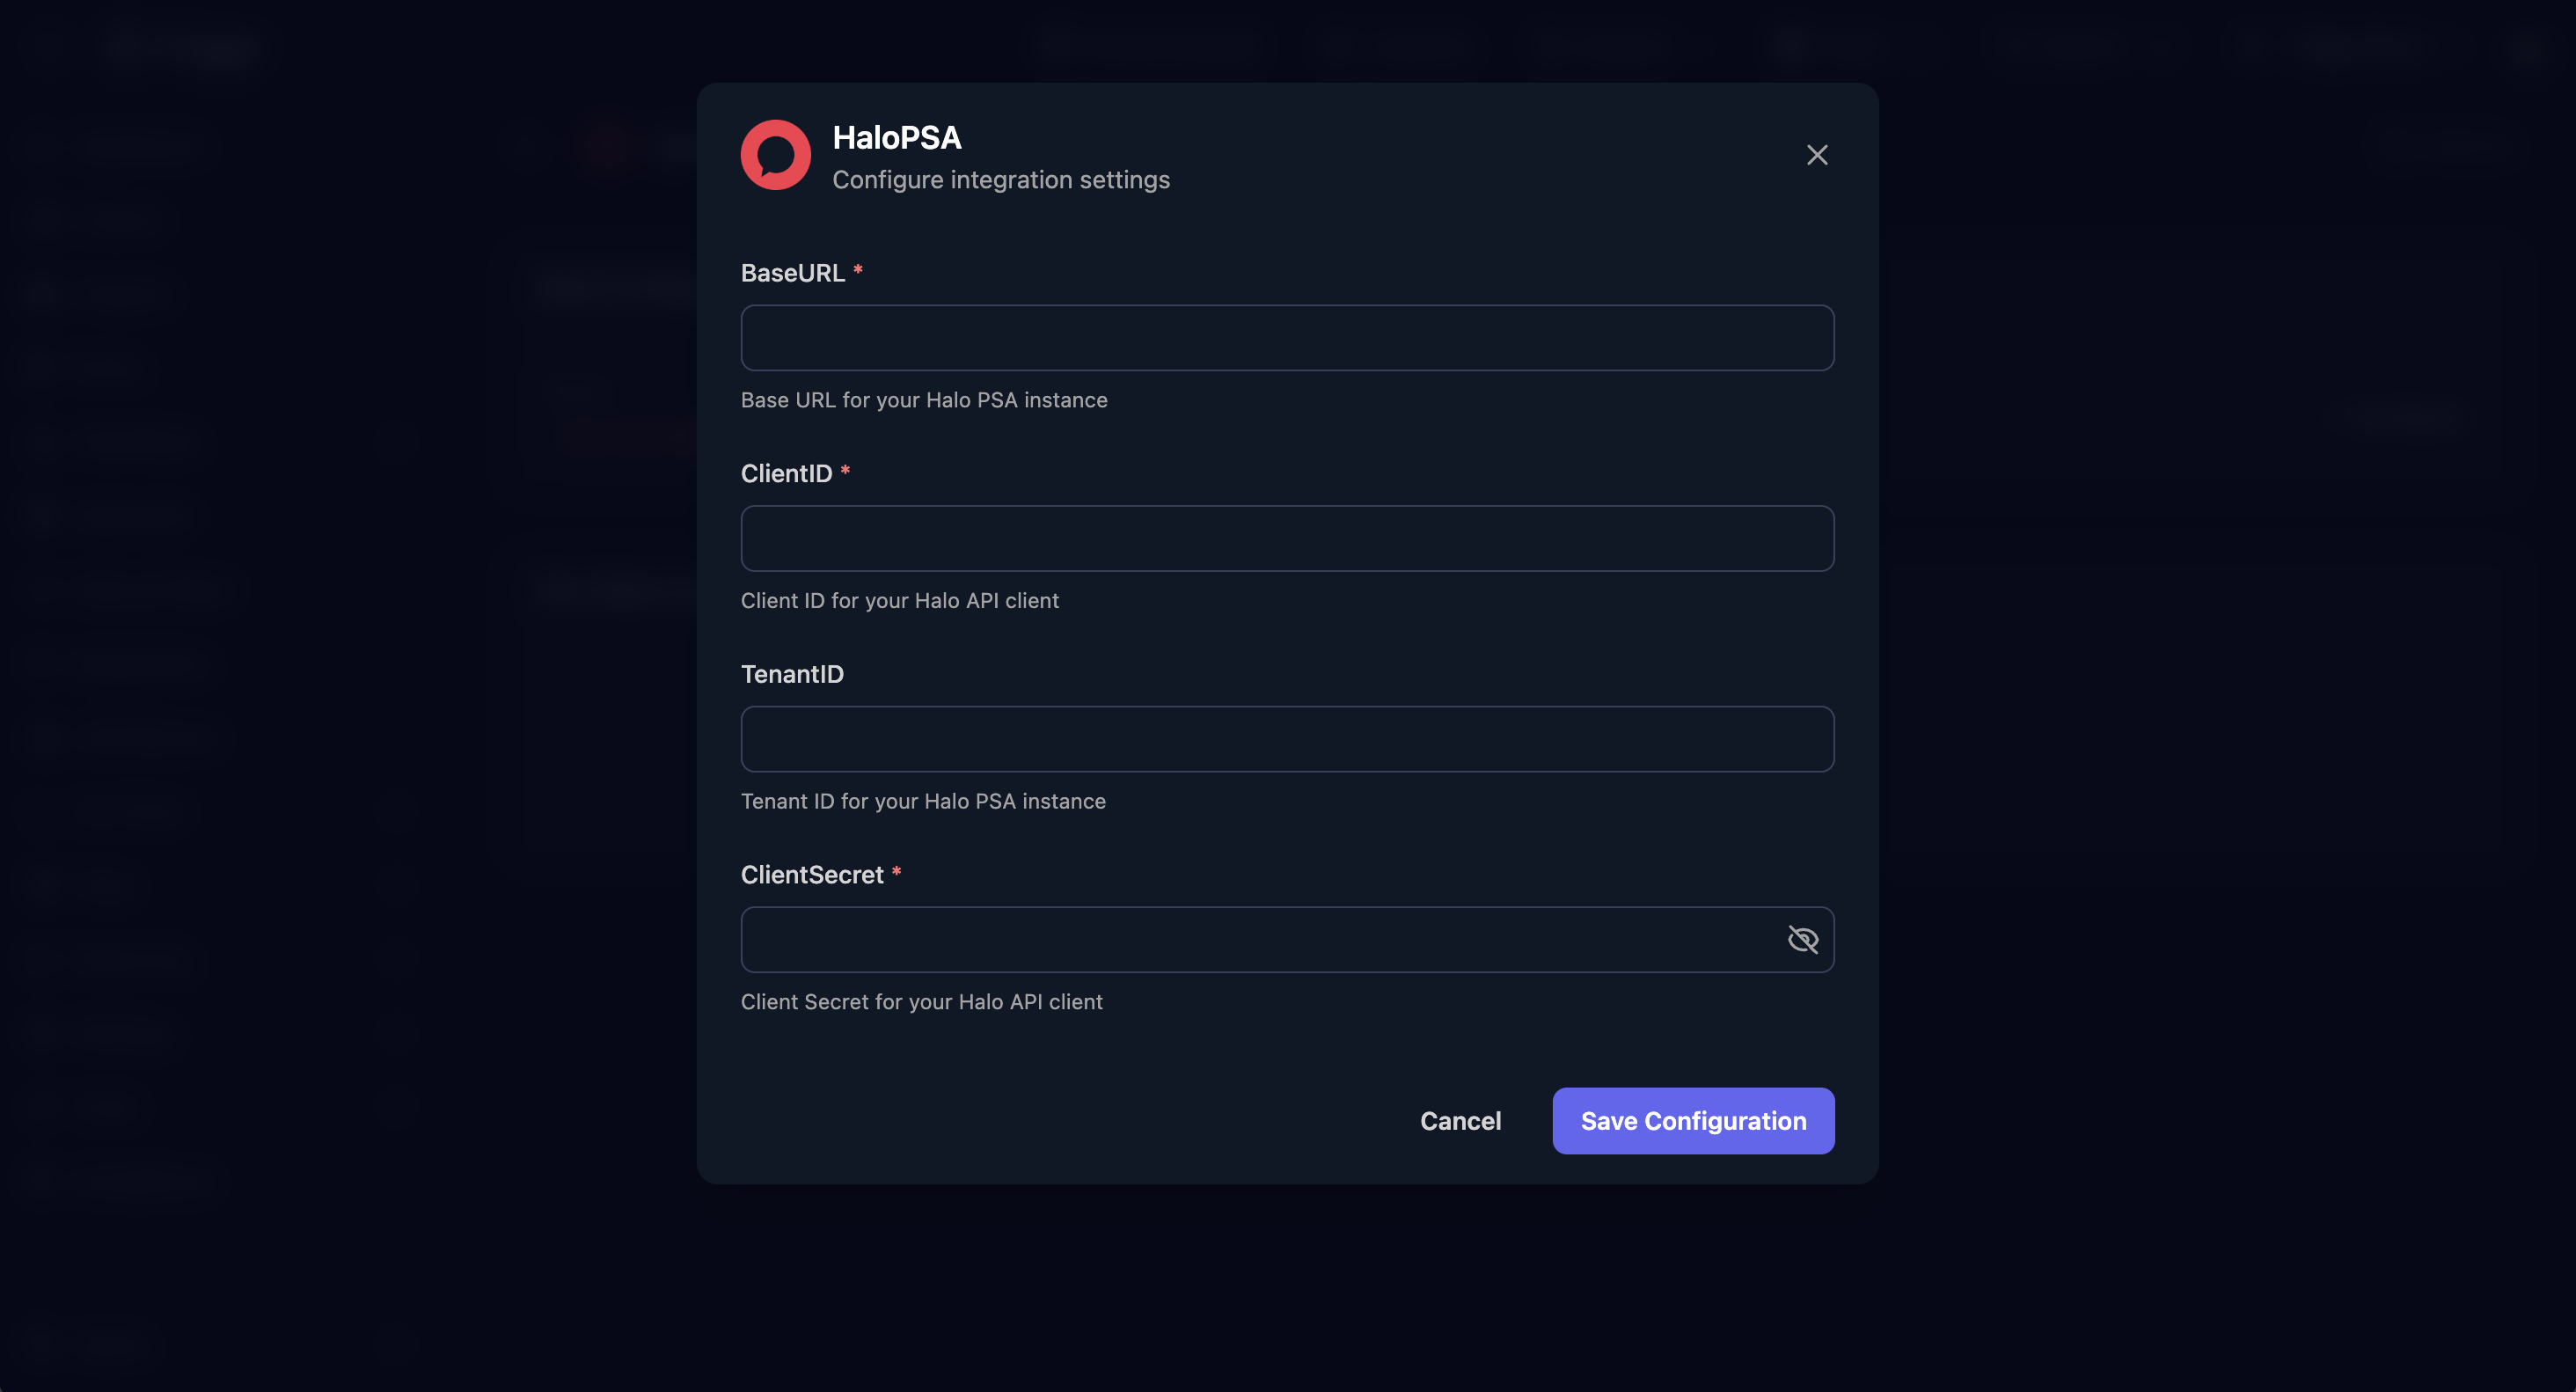
- Click Save Configuration
Note: When entering hostnames, remove the
https://prefix and any/apisuffix. Just use the base domain.
Troubleshooting
Customers Not Visible
If you can't see all customers in Triggr:
- Verify Allow use of all Customers is set to Yes in the API application
- Check that the
Triggr APIagent has been added to all relevant teams - Ensure the agent has Administrator permissions
Missing Boards or Teams
If boards or teams don't appear in configuration:
- Verify the API application has the All permission enabled
- Check the agent is assigned to the relevant departments
- Refresh the integration in Triggr
Authentication Errors
If you receive authentication errors:
- Verify the Client ID and Client Secret are entered correctly
- Check the hostname format - it should be
yourcompany.halopsa.comwithouthttps:// - For the Auth Server, ensure you've added
/authto the hostname - Verify the API application is set to Client ID and Secret (Services) authentication
On-Premise Installations
For on-premise HaloPSA installations:
- Set Is On-Premise to Yes in Triggr
- Ensure your HaloPSA server is accessible from Triggr's IP addresses
- Check firewall rules allow inbound API connections
Need help? Contact your account manager - we're happy to help configure this integration with you.